Print
Very Berry Homemade Jam
Feel free to cut this recipe in half or double it. It’s very flexible. If using strawberries, be sure they are stemmed and sliced. You can buy canning jars in many supermarkets and hardware stores.
Servings 9 to 10 eight-ounce jars of jam
Ingredients
- 4 pounds blackberries , ollallieberries, raspberries, or strawberries that have been washed and picked of any stems or debris (strawberries should be stemmed and sliced)
- 2 large apples , cored and grated (ok to include the peel )
- 2 pounds sugar
- Special equipment: Ten 8-ounce canning jars such as Ball Jars (you may not need them all, but better to have too many than too few); a good pair of tongs, preferably with rubber tips, or canning tongs.
Instructions
-
Remove the lids and metal bands from the jars and put them, along with the jars, into a large, heavy pot. Cover by at least 1 inch with water and bring to a boil. Boil for 1 minute. Remove from heat.
-
Use a clean pair of tongs to carefully remove the jars from the water and let them dry on a clean dish towel on the counter. Leave the pot with the water on the stove. You will need it later.
-
Put 1 small plate into the refrigerator to chill.
-
Into another large, heavy-bottom pot, mix together the berries, grated apples, and sugar. If the berry mixture fills the pot more than halfway, divide the mixture into two pots. The fruit will bubble and spatter as it cooks and it is best not to have a very full pot.
-
Turn the heat to high, and cook, mashing and stirring occasionally, until the berry mixture comes to a boil.
-
Boil for about 15 minutes, skimming off any pink foam that settles on the top with a large spoon. Discard the foam. Stir the jam regularly. As the jam begins to thicken, stir continually so it doesn’t stick to the pot.
-
When the mixture thickens and feels heavy as you draw a spoon across the bottom of the pot, you are nearly there. To test for doneness, spoon a little jam onto the chilled plate. It should have body to it and shouldn't run too much on the plate. If it needs further cooking, let it boil another five minutes and check again. Continue until it is done, keeping in mind that the jam will thicken considerably once it cools.
-
Once the jam is done, remove from heat. Use a supremely clean ladle to spoon the jam into the jars, filling them nearly to the top. Wipe the rims of the jars with a damp cloth. Set the lids on top, add the bands, and screw them shut. Put the jam jars into the pot of water you used to sterilize the jars. Add more water if needed so it reaches an inch over the top of the jars. Bring to a boil over high heat and boil for 10 minutes. Let cool for 5 minutes.
-
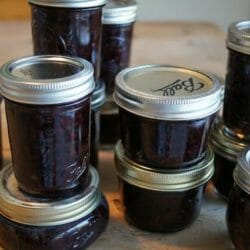
Use the tongs to carefully remove the jam jars and set them upright on the counter. Press the lids down to be sure they are slightly concave, which means they are properly sealed. Store jam in the pantry for up to 1 year. If a jar isn't properly sealed (has a lid that bulges upwards) it should be stored in the fridge and used within 3 weeks.