Little Lunch Box Cheese and Broccoli Calzones


This post was sponsored by Flatout. It's partnerships like these that help keep Mom's Kitchen Handbook up and running.
The job of packing school lunches gets easier with every passing year. With my oldest now off to college, I’m down to just two lunches to think about instead of three. And the older my kids are, the more they take over the job of lunch packer.
And why not? Children are perfectly capable of pitching in, even when they’re little. It doesn’t hurt, though, to throw some fun into the mix, so that making meals feels more like a craft project than a chore. Today’s recipe for Little Cheese and Broccoli Calzones is a perfect example.
If the notion of whipping up pizza dough for lunch calzones has you running for the Lunchables, not to worry. I’ve got a clever shortcut that works like dream: Flatout Foldits make an ideal, ready-to-go crust for housing an oozy cheese and broccoli filling.
I set Virginia to the task of making a batch of these little calzones. Here you’ll see her step-by-step process with the full recipe to follow.
If you’re stuck for more school lunch inspiration, head on over here, where you’ll find a whole slew of ideas.
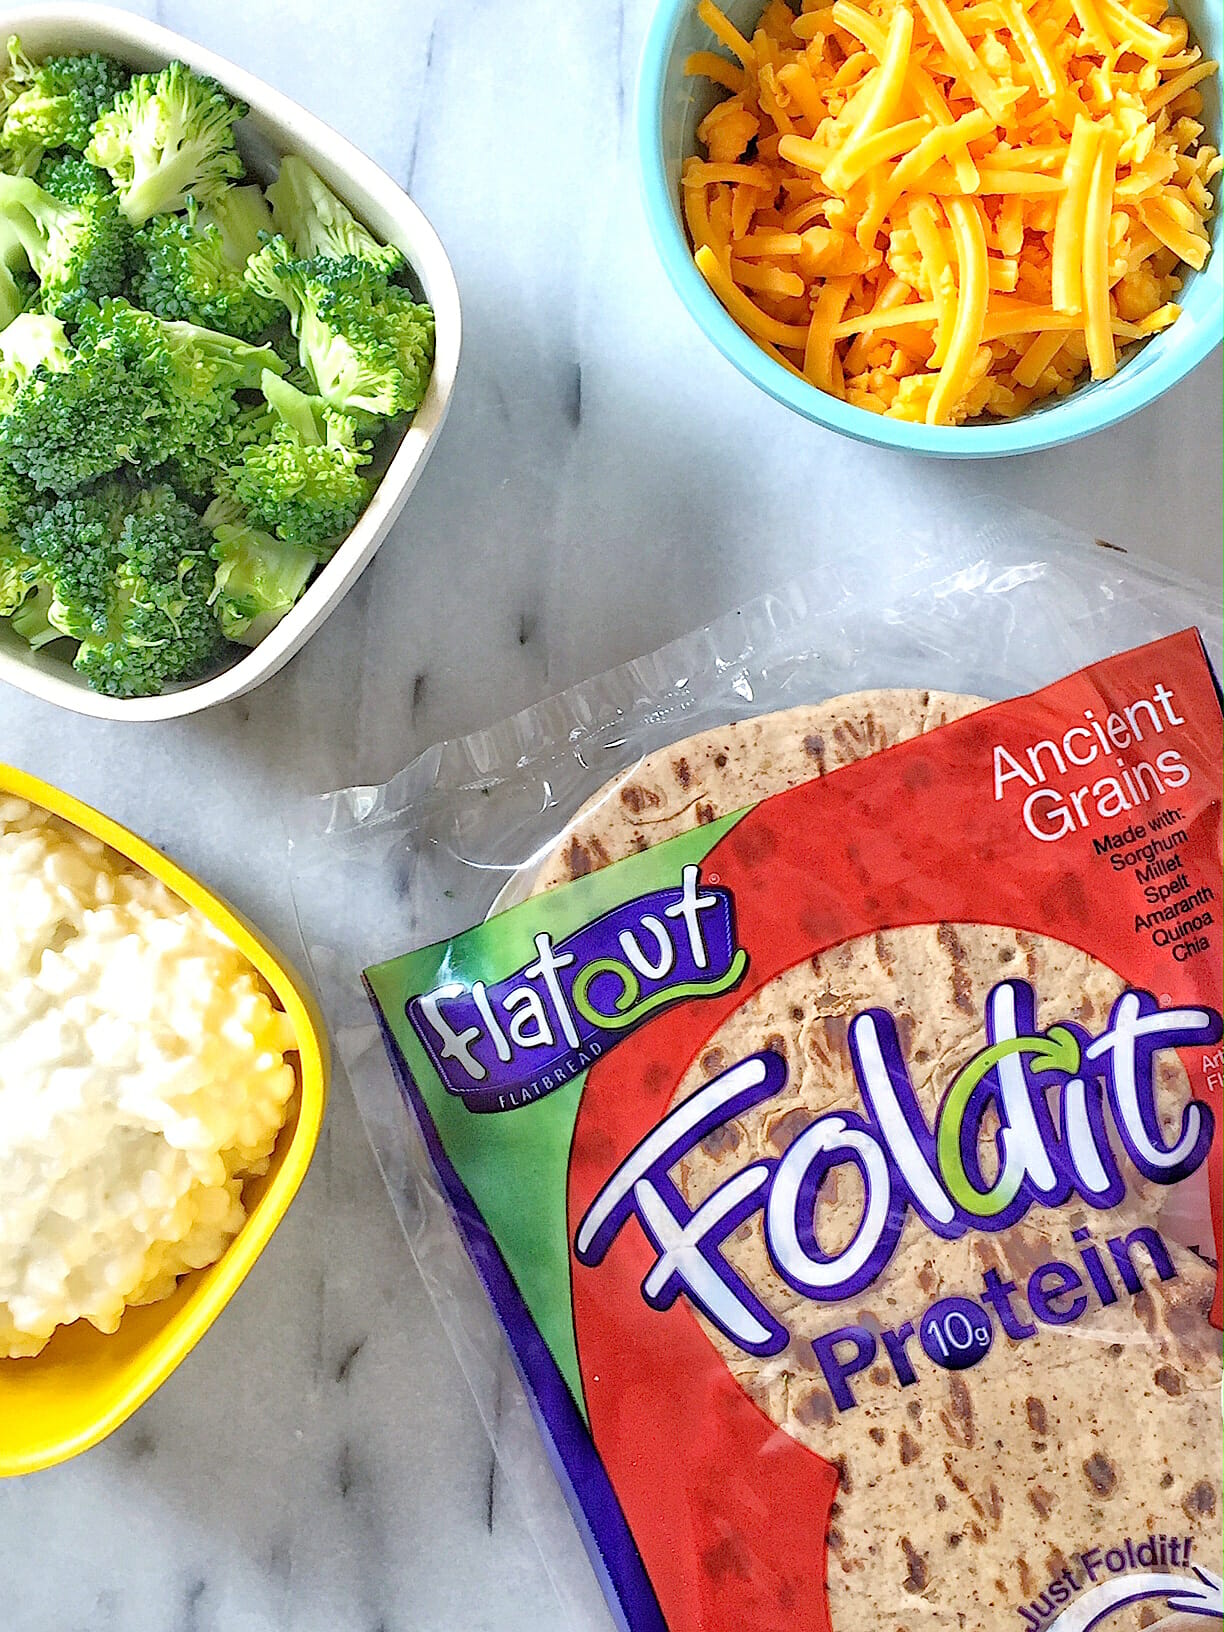 Gather your ingredients: Shredded Cheddar, cottage cheese, chopped broccoli, and Flatout Foldit.
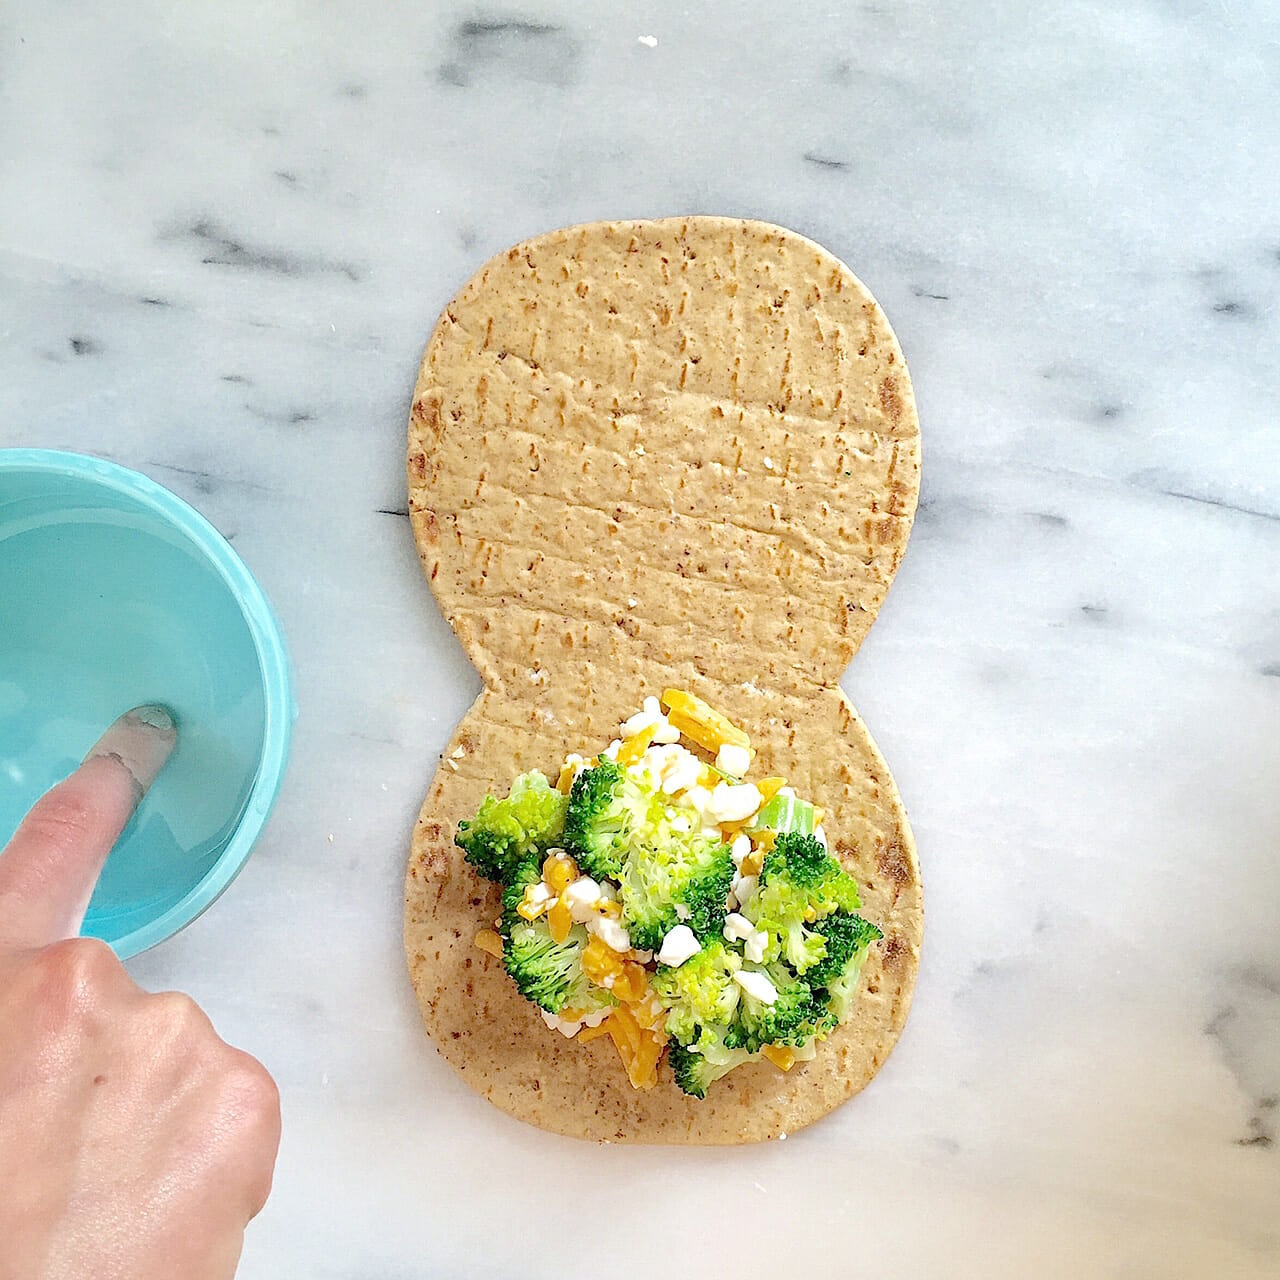
Once your filling is ready, spoon it onto the bottom half of a Flatout Foldit. Dab a finger in a dish of water and moisten the edge of the bread that surrounds the filling.
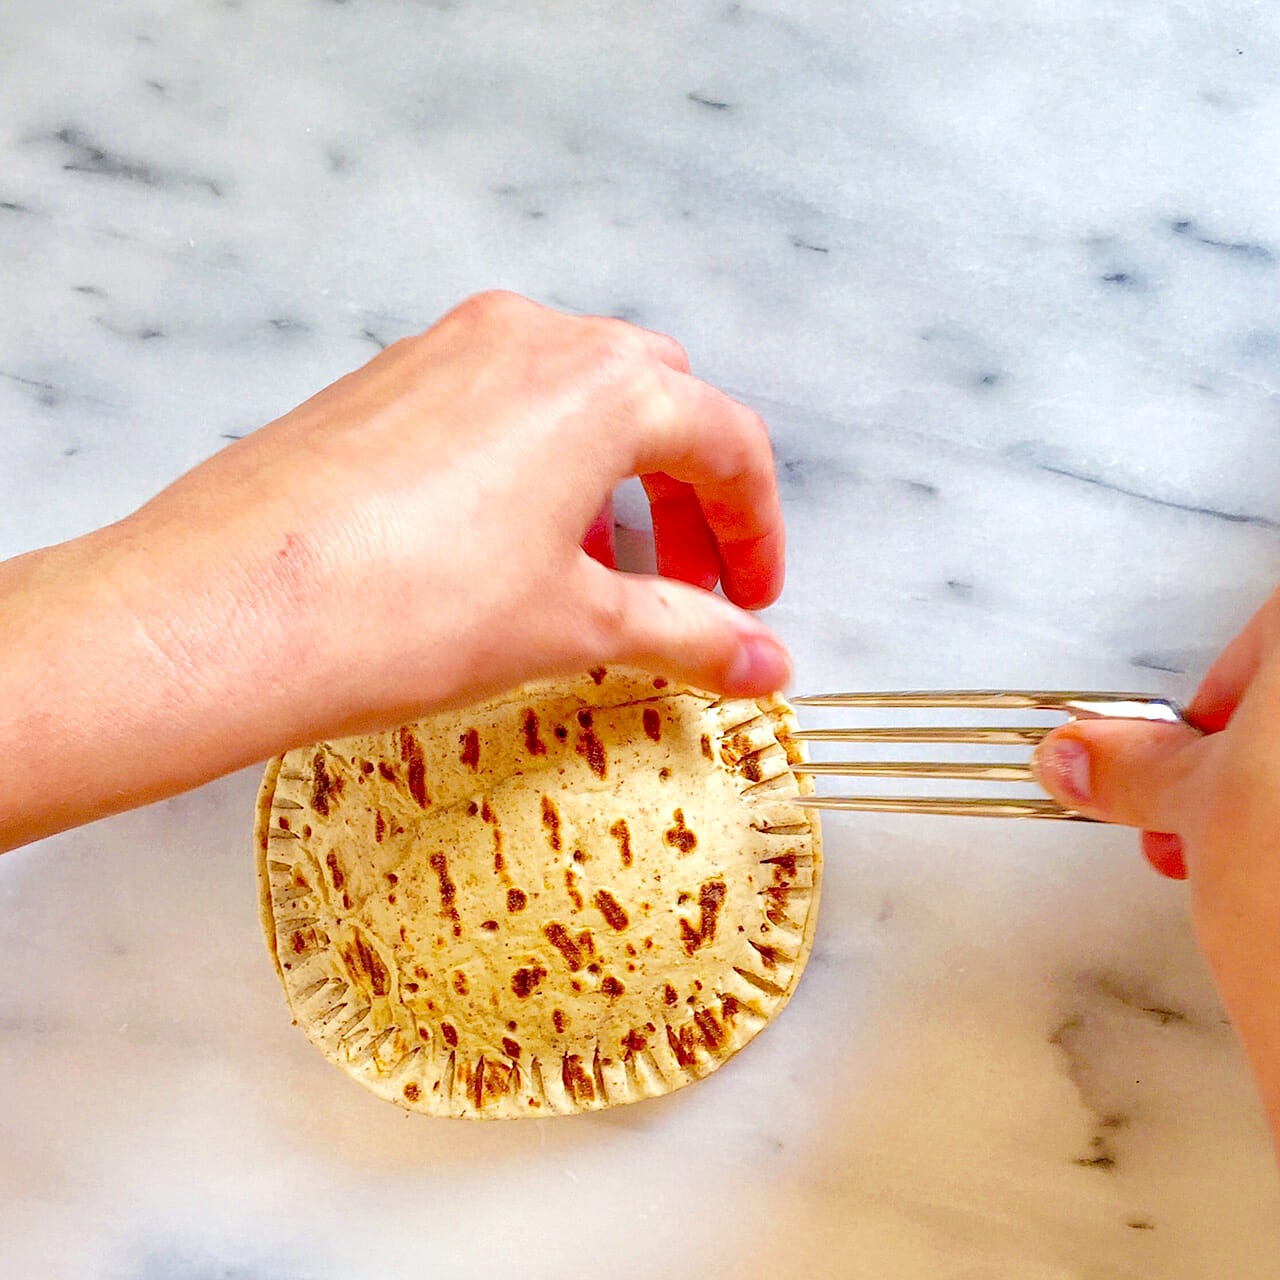
Lift the top of the Foldit to cover the filling, so the edges line up. Use the tines of a fork to press the two sides together, forming a tight seal. Be firm here, otherwise the filling will escape while the calzones cook.
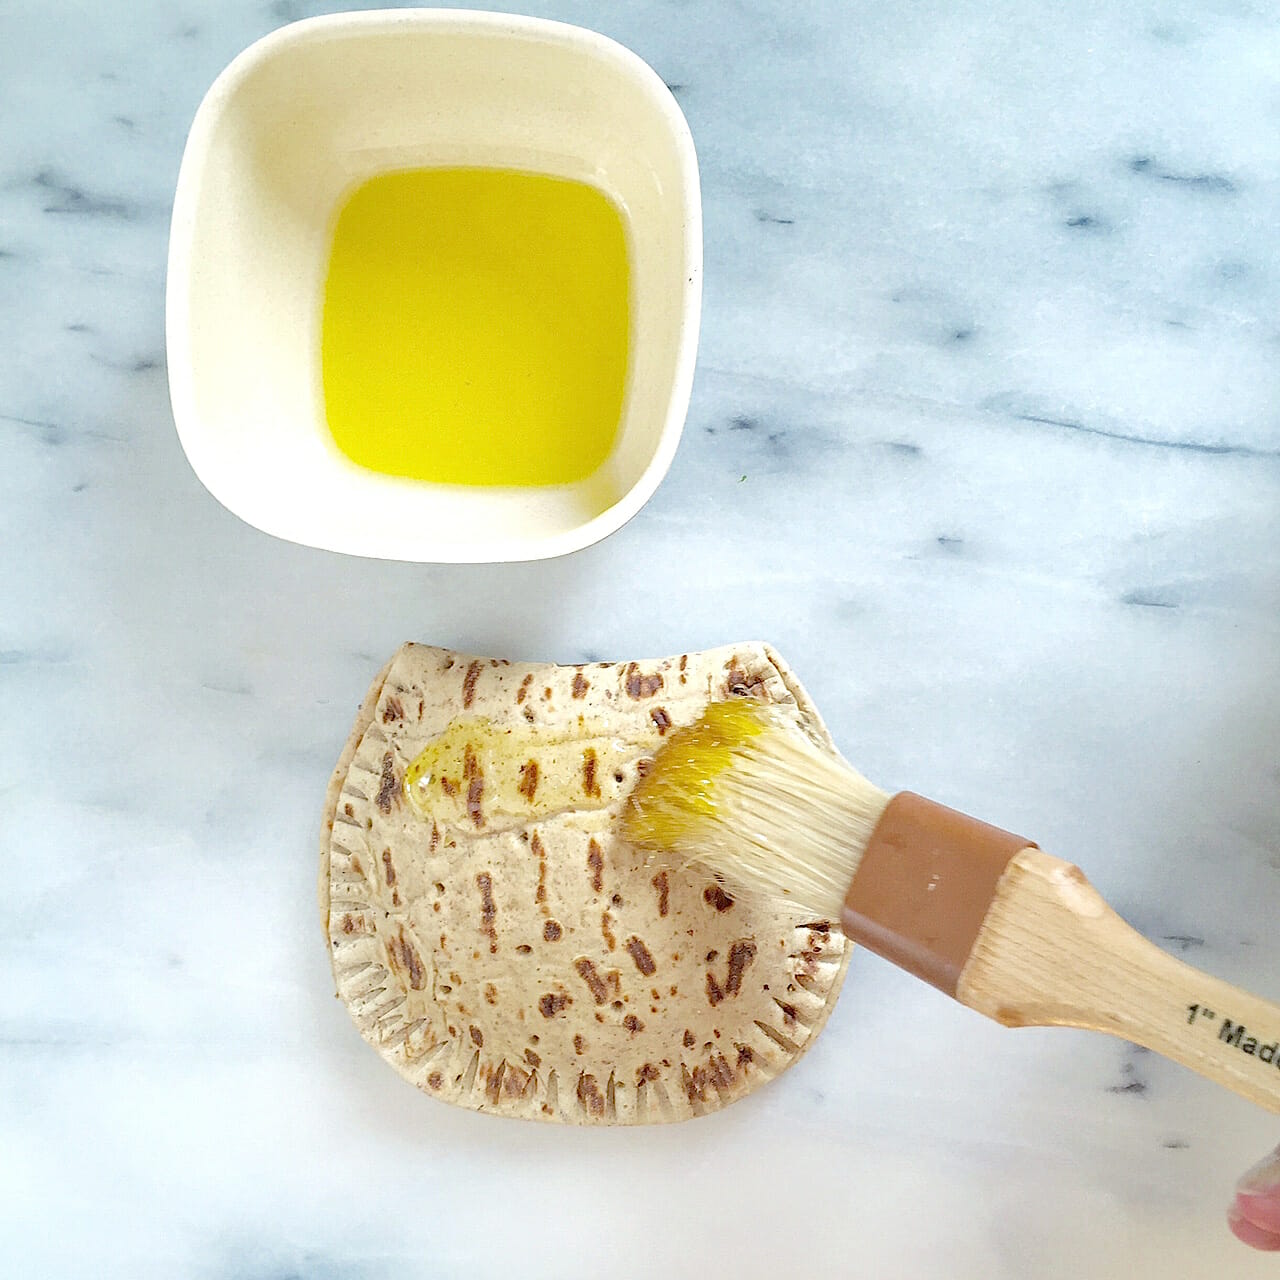
Brush lightly with olive oil.
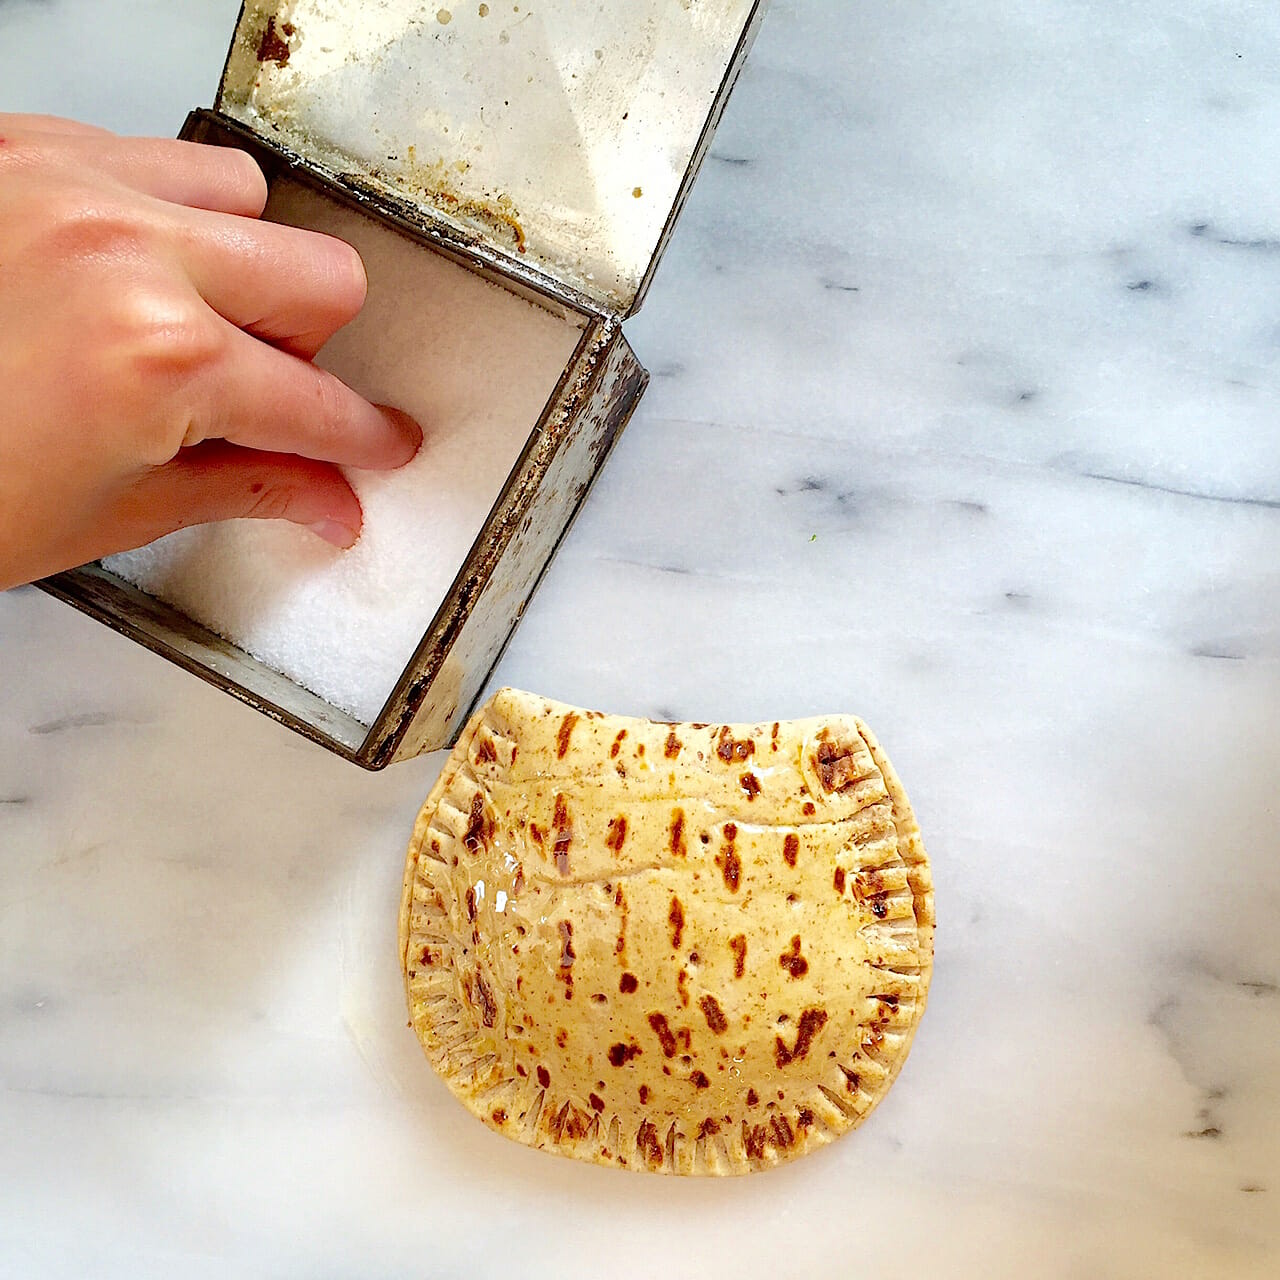
Sprinkle on a tiny pinch of salt.
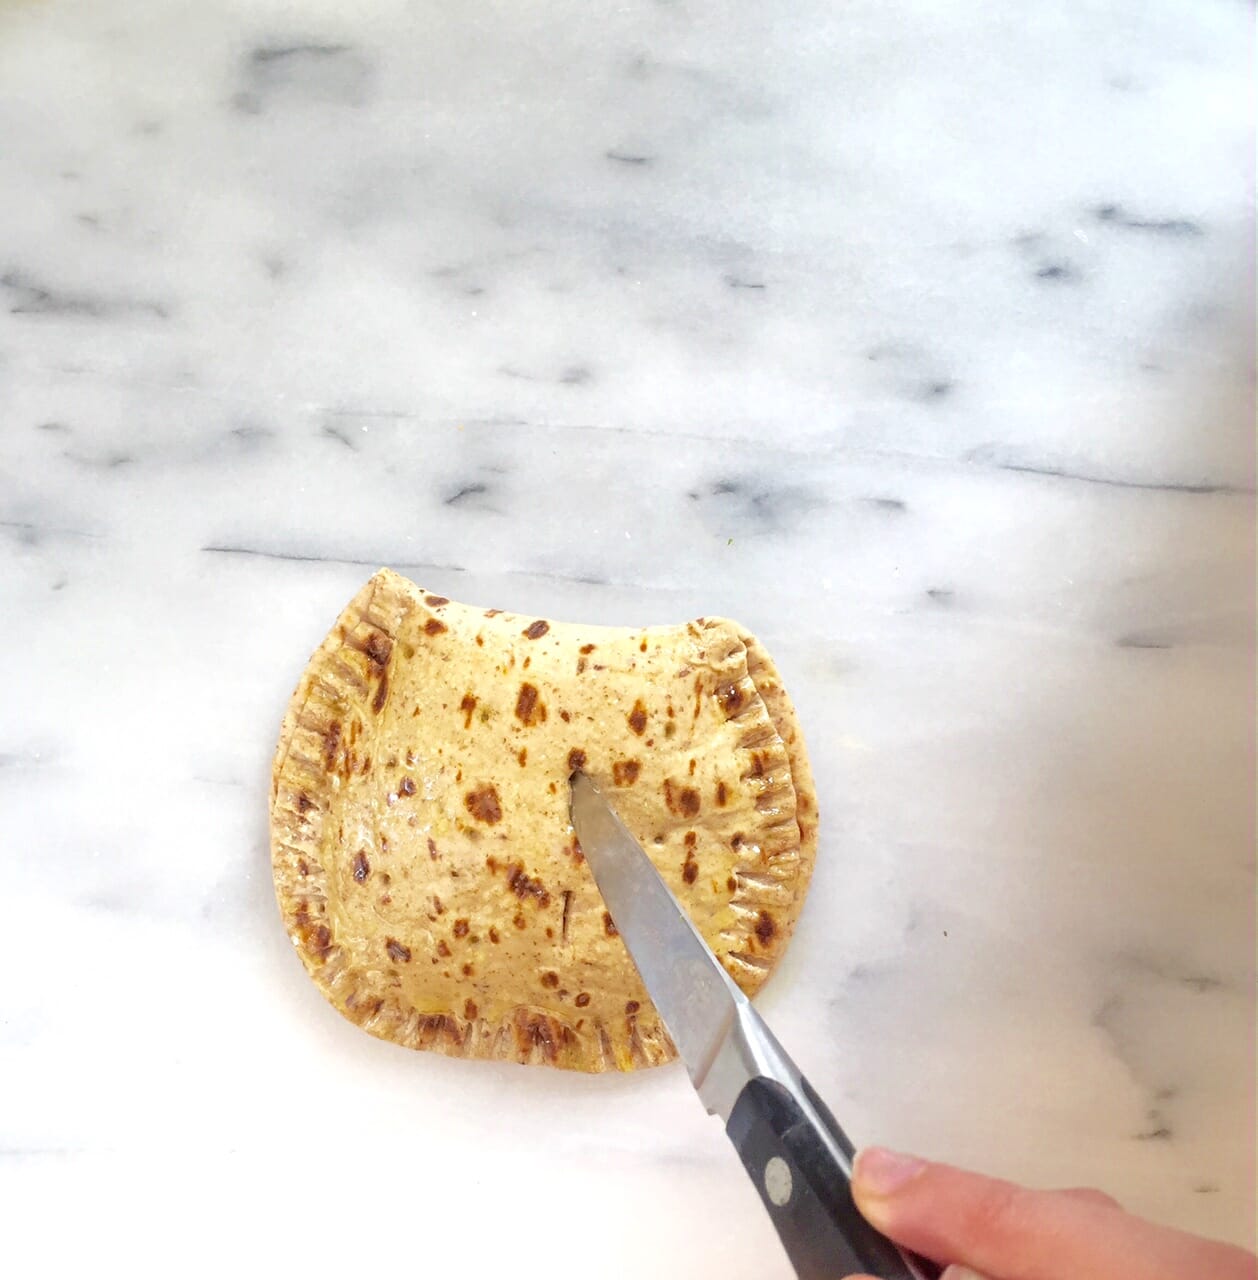 Poke the bread a few times to allow steam to escape while it bakes for about 15 minutes.
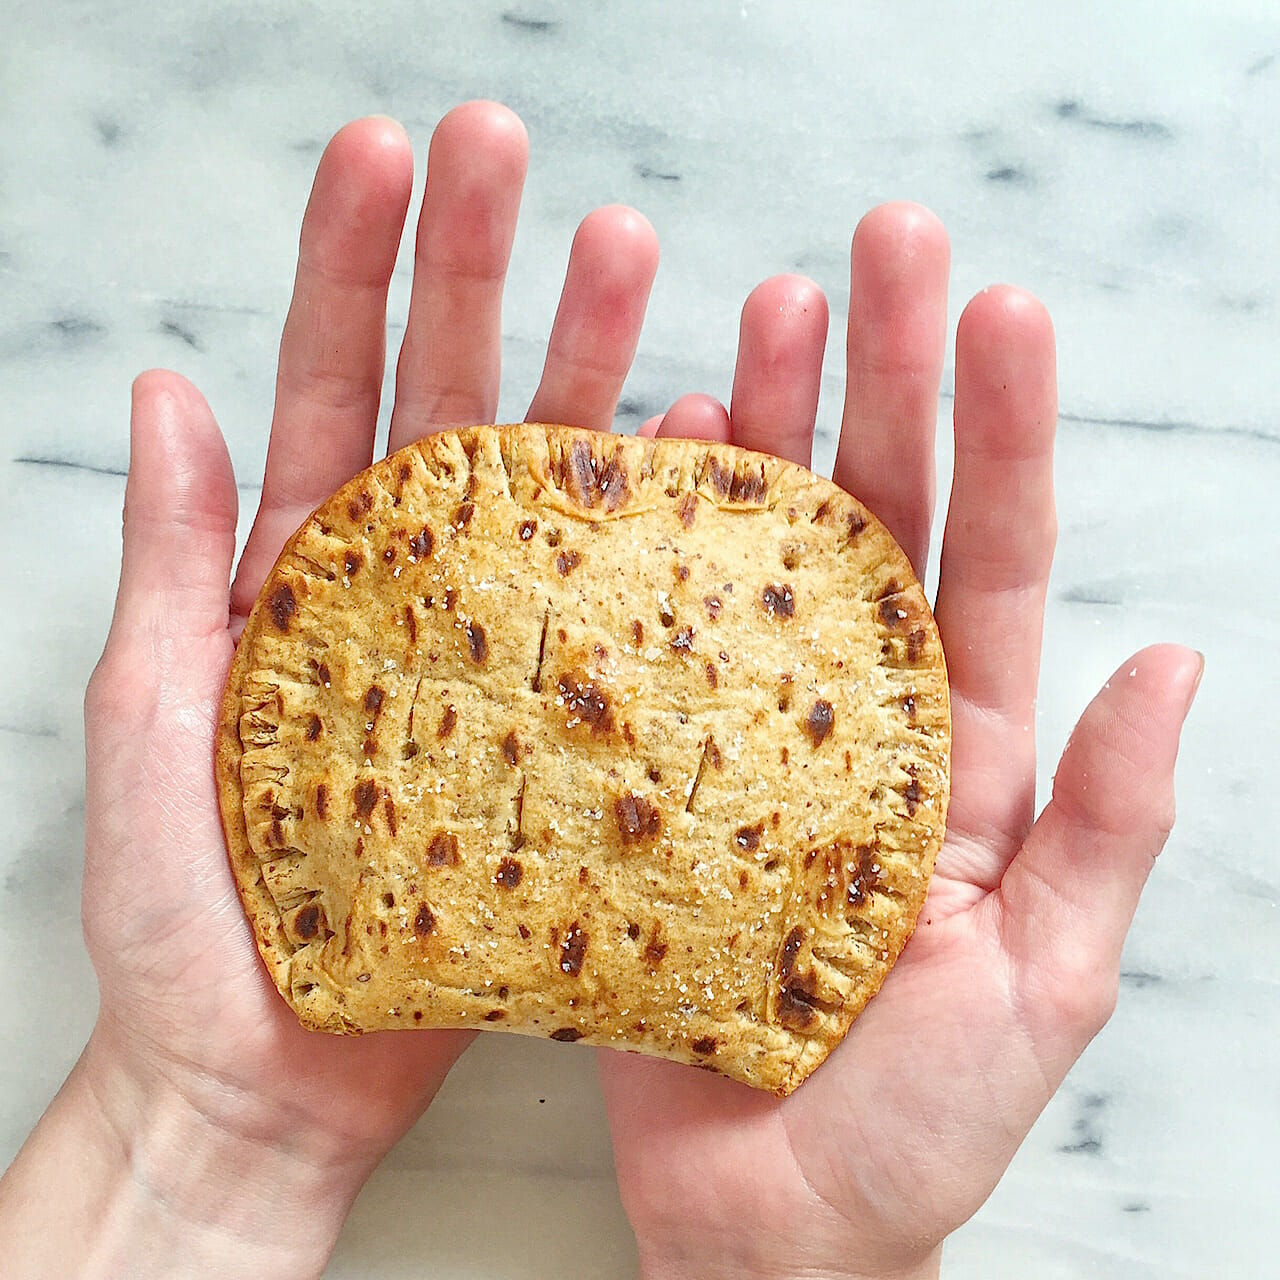
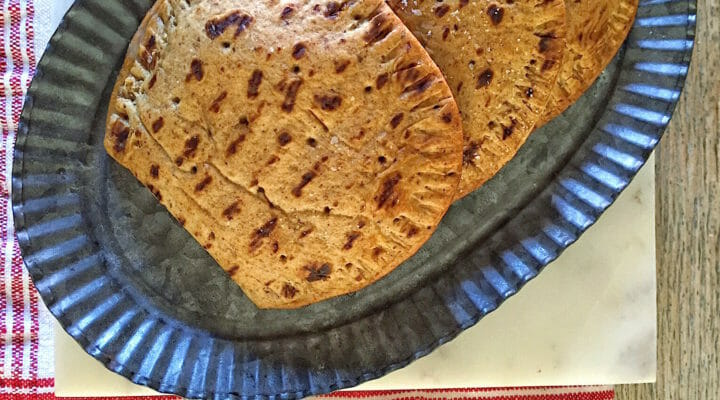
Tada! Your little calzone is ready to eat, either on the spot or packed up to go for lunch.
Little Cheese and Broccoli Calzones
Ingredients
- 1/2 cup small curd cottage cheese
- 1 cup chopped broccoli florets (small bite-size piece)
- 2/3 cup coarsely grated sharp Cheddar Cheese
- Pinch salt plus more for finishing the calzones
- Black pepper
- 4 Flatout FoldIts
- Olive oil
Instructions
-
Preheat oven or toaster oven to 400 degrees F.
-
Put the cottage cheese into a fine mesh strainer or colander for a couple of minutes to drain off any visible liquid.
-
Meanwhile, steam the broccoli until just tender. Set on a dish towel to absorb any liquid and transfer to a medium bowl. Add the cottage cheese, Cheddar, pinch of salt, and a few grinds of black pepper. Stir.
-
Lay the Flatout Foldits on your work surface. Spoon the broccoli mixture onto the center of the bottom of each Foldit, leaving a 1/2-inch border around the edge.
-
Dip a finger in water and moisten the perimeter of the Foldit around the broccoli mixture. Lift the top of the Foldit to cover the broccoli so the seams of the two sides match up. Use the tines of a fork to press very firmly down around the perimeter of the bread so the sides seal up. You can be pretty aggressive here to make sure you've got a good seal.
-
Lightly brush the top of each calzone with olive oil. Add a tiny sprinkle of salt to the surface of the bread. Pierce the surface of the bread in a few places with the tip of a small knife
-
Put calzones on a baking sheet and bake until they turn crusty and nicely browned, about 15 minutes.
-
Remove from the oven and immediately transfer to a baking rack to cool (this will keep the calzones crisp, especially if liquid has oozed out during cooking).
-
Serve when cool enough to handle or pack into a lunch box for later.
Comments
08.27.2016 at6:55 AM #
kajal
Such an easy recipe! This is indeed nutritious and light enough for lunch boxes. Visit http://www.kidsfront.com/ for more learning activities for kids.